Notification when car is full charged (Node-Red, BMWi3)
My little Wallbox Notification App with NodeRed, ModbusTCP, MQTT
With my solution I capture the amount of power I get from the grid to fill my BMW i3. To monitor and visualize that I put some software together and it is done. After some time I would say, it is easy 😉 Of cource I had to learn some things but there are enough tutorials out there to get things done very quickly.
Thanks to Xose Pérez who gave me the idea of the Solution! His blog post shows the same with the washingmachine 😉
For that solution I use a couple of things:
- Wallbox with PowerMeter and ModbusTCP Interface
- Node-Red Software – https://nodered.org/
- InfluxDB for Timeseries Persintancy (optional) – https://www.influxdata.com/
- Grafana for Presentation (optional) – https://grafana.com/
- Telegram for Notification – https://telegram.org/
THE SOURCE – My Wallbox
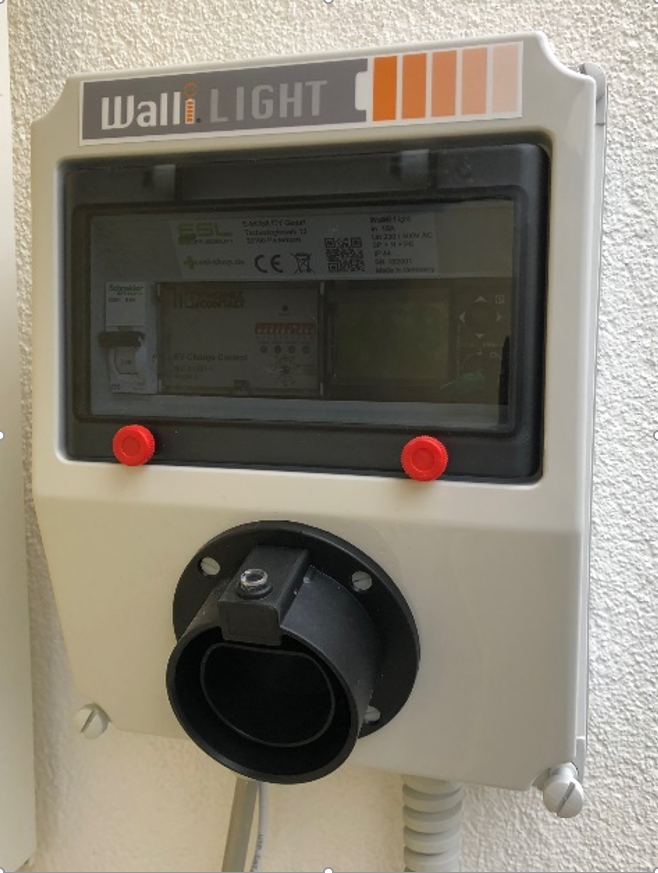
I bought it here – nice guys and very friendly: https://esl-shop.de/de/11kw-wallbox-ladestation-elektroauto-energiezaehler.html
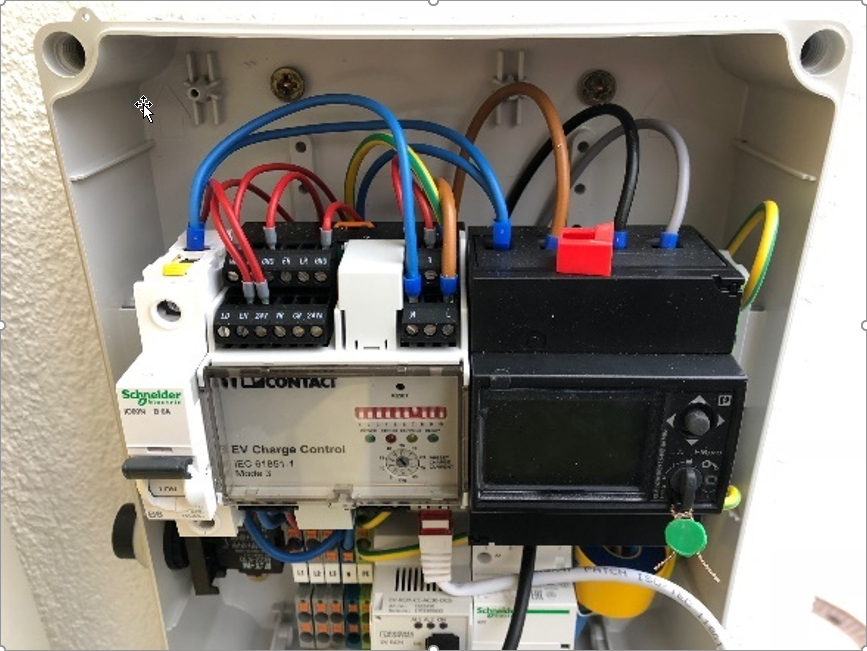
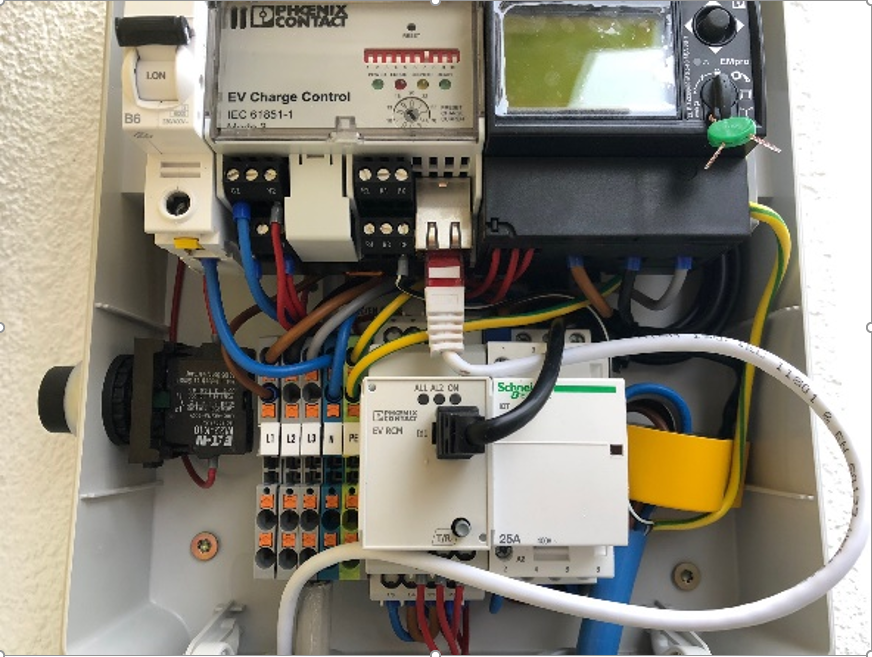
The Wallbox energy data can be read with
the ModbusTCP Protokoll very easy! The phoenix contact control box is a very
well known and well documented device for many wallbox systems spread over the
world.
The tecnical datasheet can be found here https://www.phoenixcontact.com/online/portal/at?uri=pxc-oc-itemdetail:pid=2902802&library=atde&tab=1
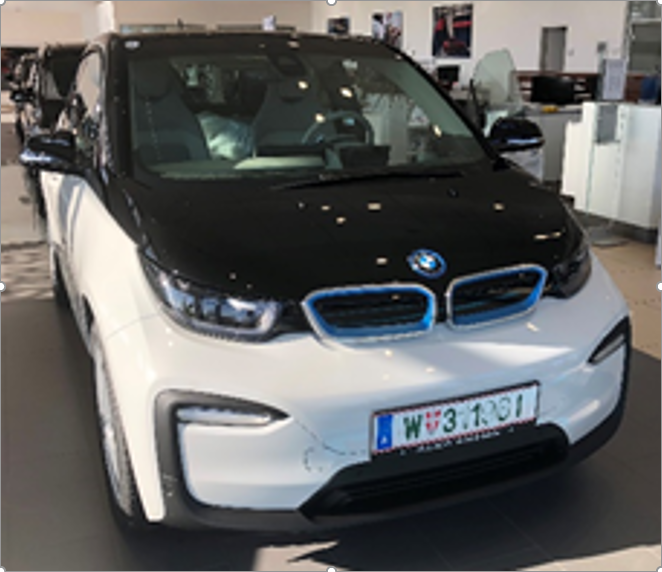
My car a BMW i3 😉
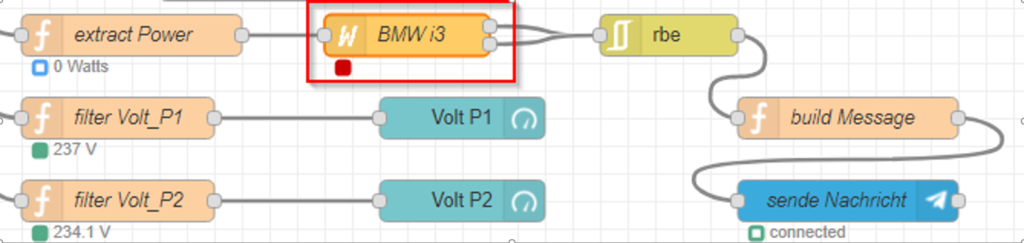
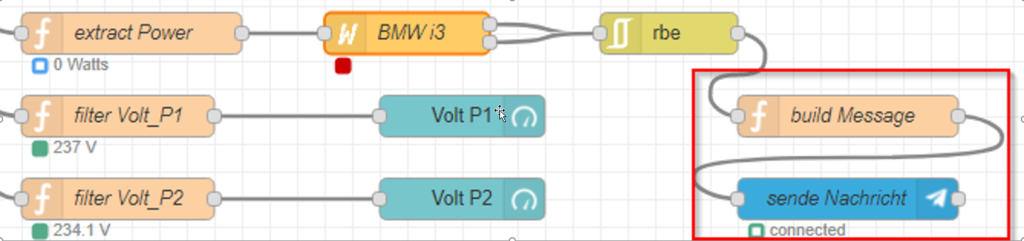
And finaly my flow in Node-Red for doing the magic thing and brings all together.
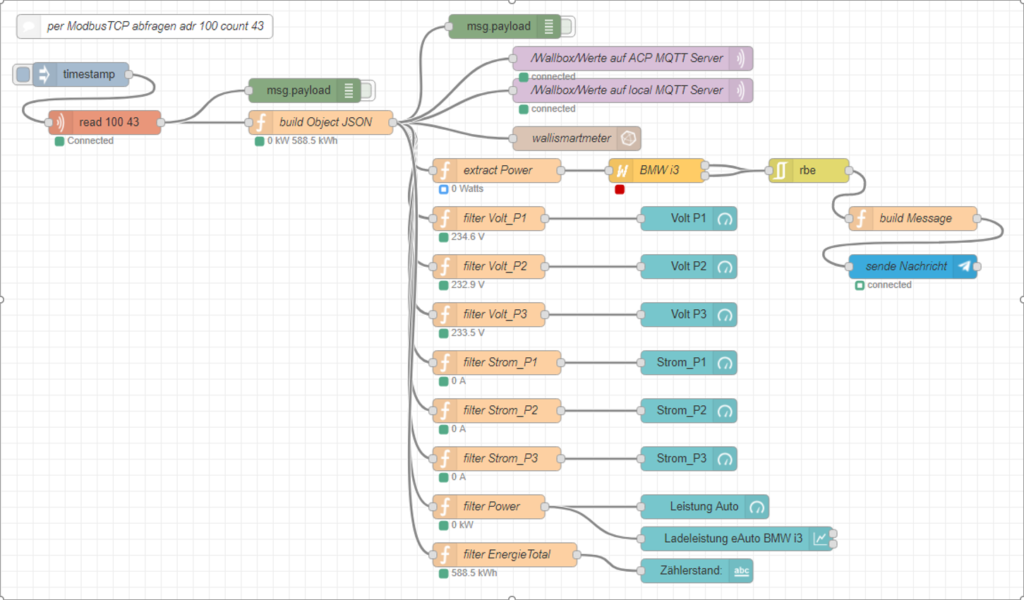
In the next screenshot i dive deep into easy node to give you the insights oft he solution. In text the steps are easy:
- Every minute the data are read from the Wallbox using the modbus Interface
- The function-Node builts up a nice JSON-object to insert it into the InfluxDB
- With the brown node the data is inserted into influxDB
- The „extract Power“ function-node any all of them are extracting a specific attribute
- the „power-meter“ Node is doing the measurements and counting consumption
- with Telegram the message is send to my mobile devices to get informed
So lets start with the Node reading the data from the phoenix contact control center:
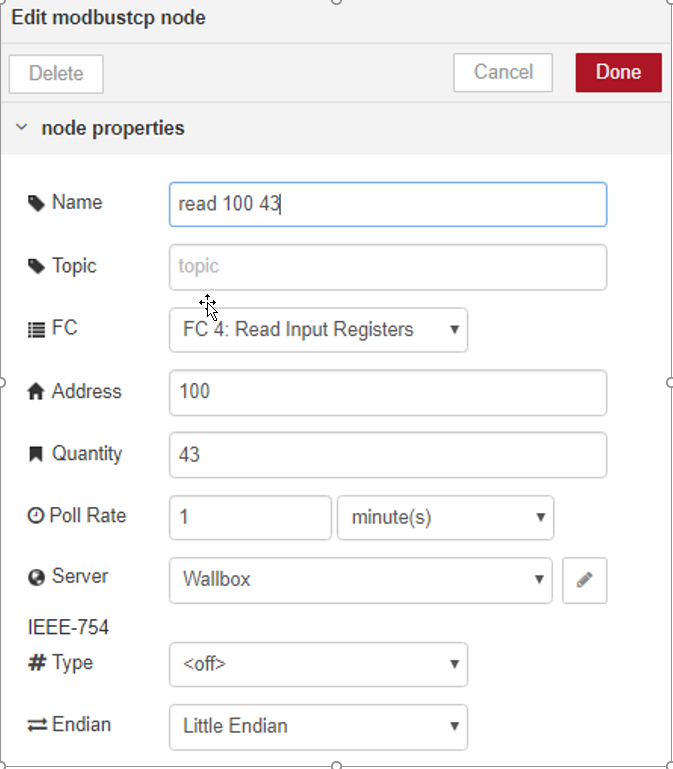
This information you can pick up from the well documented pages of phoenix!
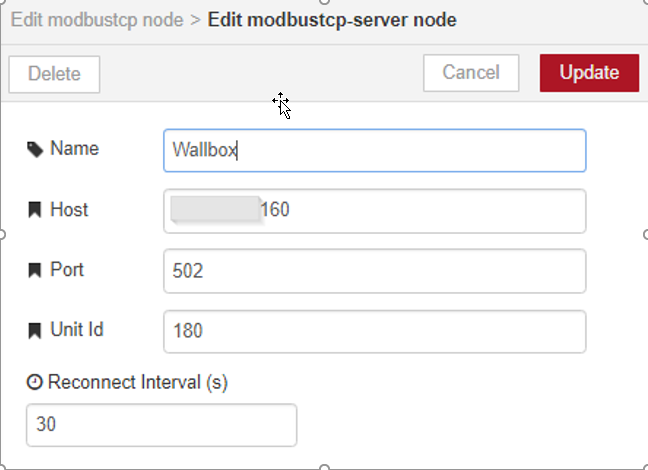
While I was pretty new to ModbusTCP I had to know that modbus uses tcp-Port 502 and of cource the configured IP-Address of your device in your LAN!
—
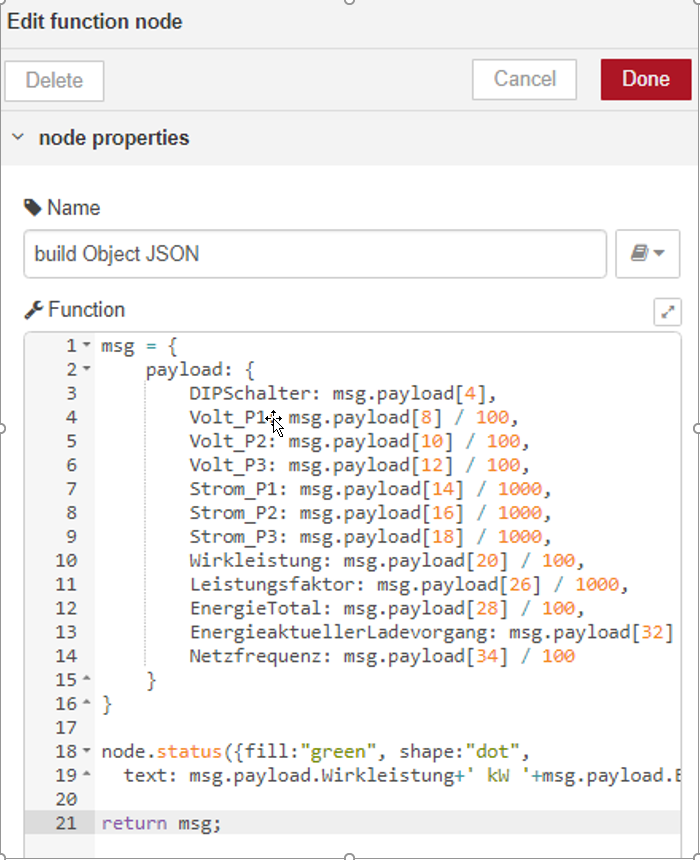
msg = {
payload: {
DIPSchalter: msg.payload[4],
Volt_P1: msg.payload[8] / 100,
Volt_P2: msg.payload[10] / 100,
Volt_P3: msg.payload[12] / 100,
Strom_P1: msg.payload[14] / 1000,
Strom_P2: msg.payload[16] / 1000,
Strom_P3: msg.payload[18] / 1000,
Wirkleistung: msg.payload[20] / 100,
Leistungsfaktor: msg.payload[26] / 1000,
EnergieTotal: msg.payload[28] / 100,
EnergieaktuellerLadevorgang: msg.payload[32] / 100,
Netzfrequenz: msg.payload[34] / 100
}
}
node.status({fill:”green”, shape:”dot”,
text: msg.payload.Wirkleistung+’ kW ‘+msg.payload.EnergieTotal+’ kWh’ })
return msg;
—
With that javascript i build up a new payload-object ready prepared for inserting to InfluxDB.
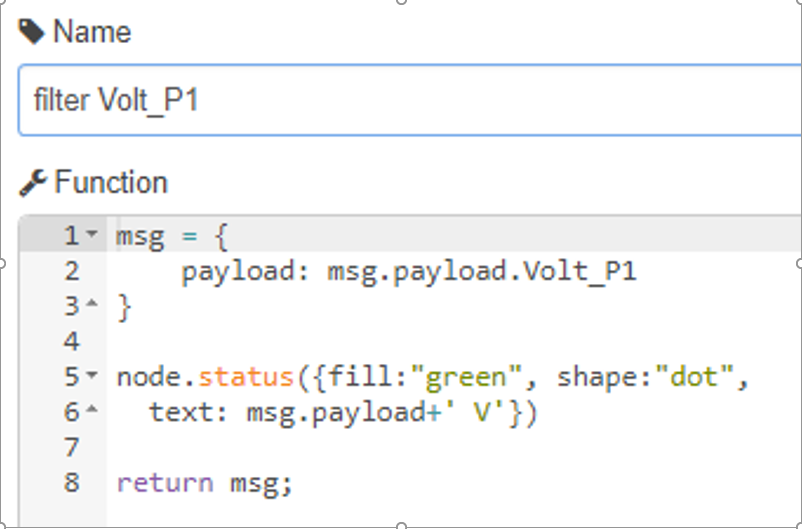
The following functions are just to filter the specific data attribute to bring the right data tot he dashboard.
The more magic staff is done by the next node called power-monitor! It messures the power amount actually coming in and counting together the power consumption.
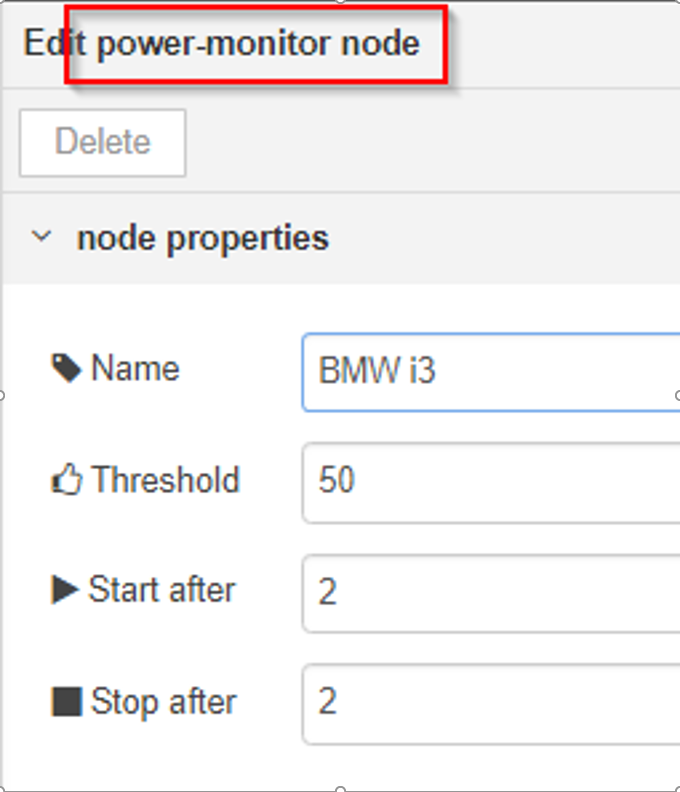
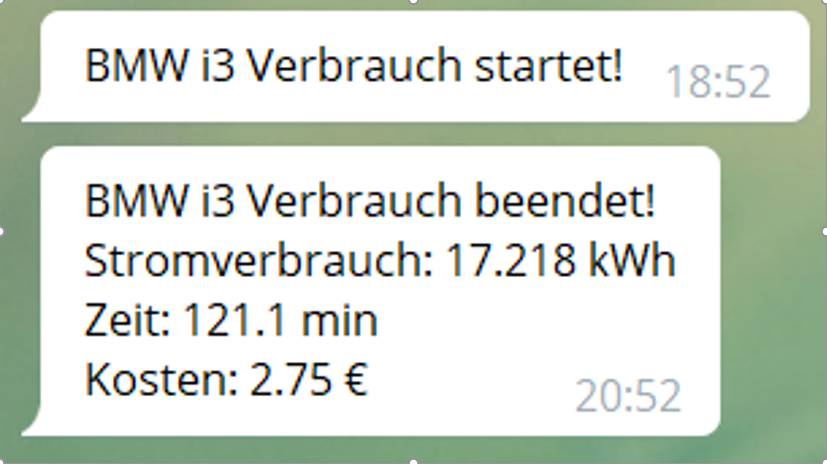
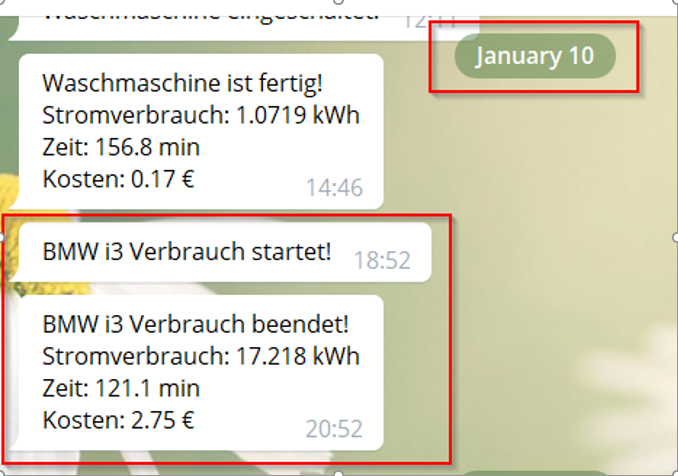
So that is to be read so: If the power consumption is over 50W for more than 2 messages the car IS charging – started! If the power consumption is under 50W for more than 2 messages the car HAS finished charging – stopped but in that stop message the time and the amount of power consumed is in the payload, so you can give that information tot he user 😉
Building the Text for Telegram. Lets focus to the last function node.
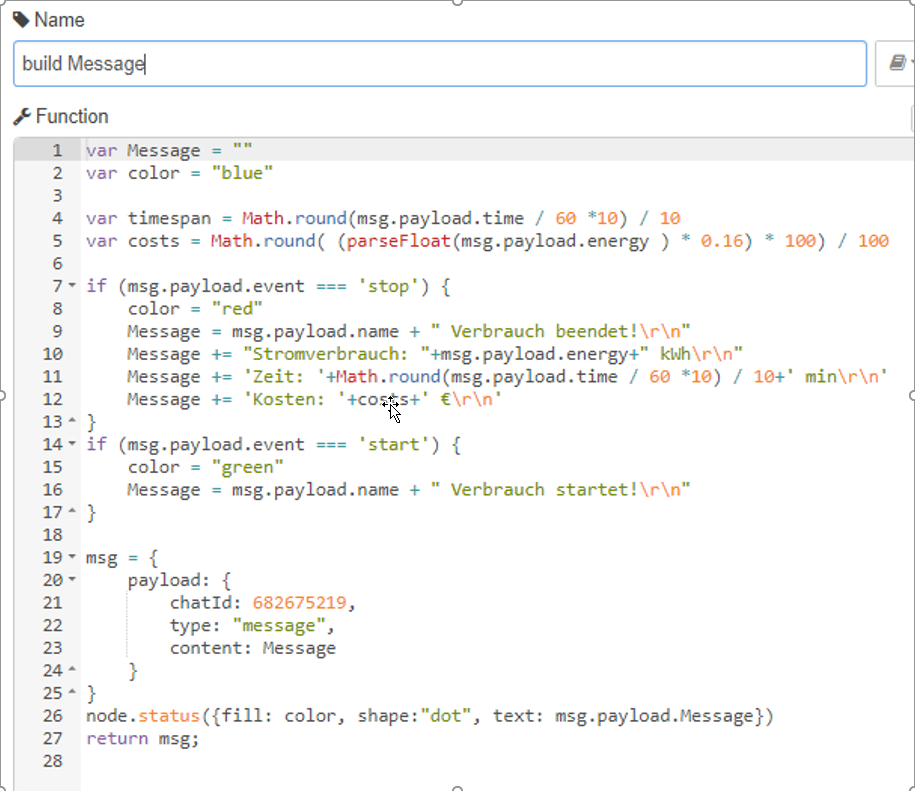
Here happens the magic doing just the summary for a nice text message on Telegram.

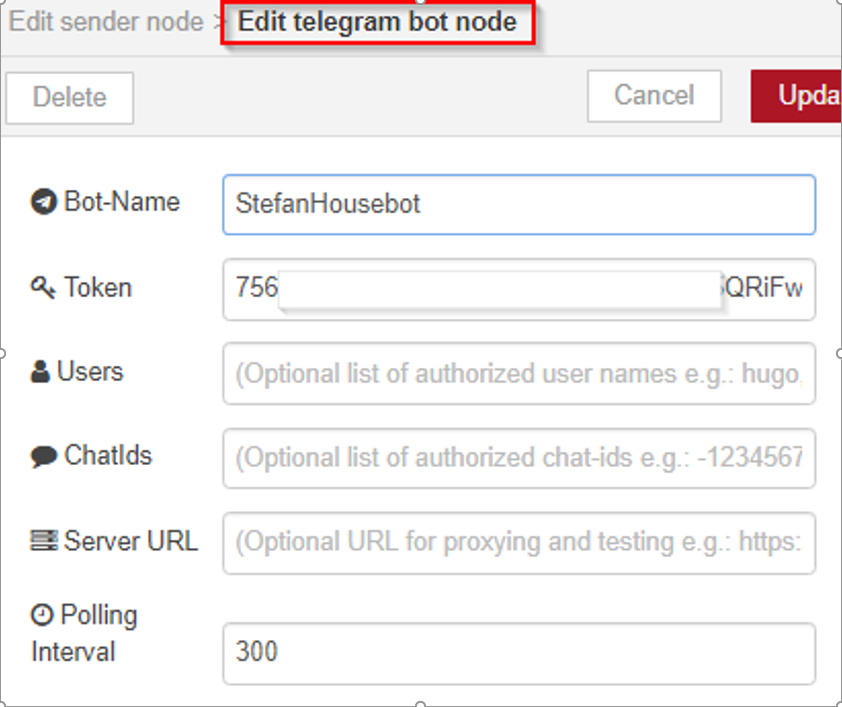
Fot the push notification i use Telegram. At the beginning oft hat story I was pretty new to Telegram but it has a perfect API you can call. Of cource you have to get an developers free Account and register your bot before using it. But its fast getting it ready to run.
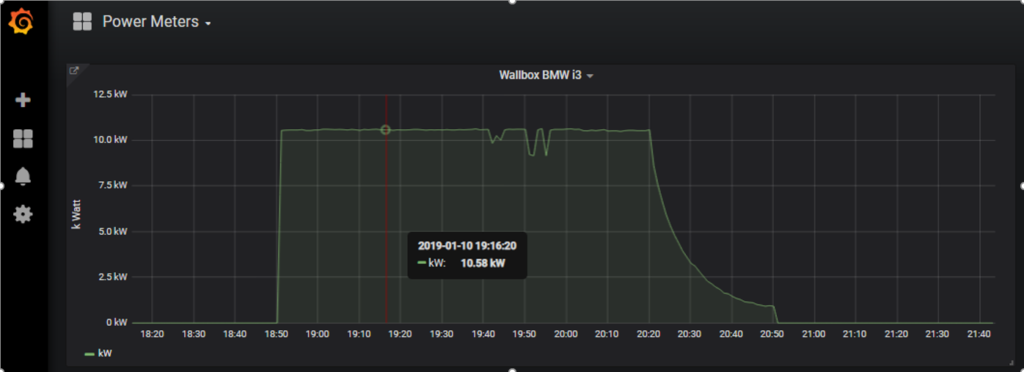
here my Grafana panel to visualize data and where i can zoom in detail if needed. That day i came home at 06:45pm and the car was about 40% full, so the charing was done in 2 hours and took 17kWh power consumption. I do my power pricing with 16 cents EUR, so the costs form y charging were EUR 2,75…
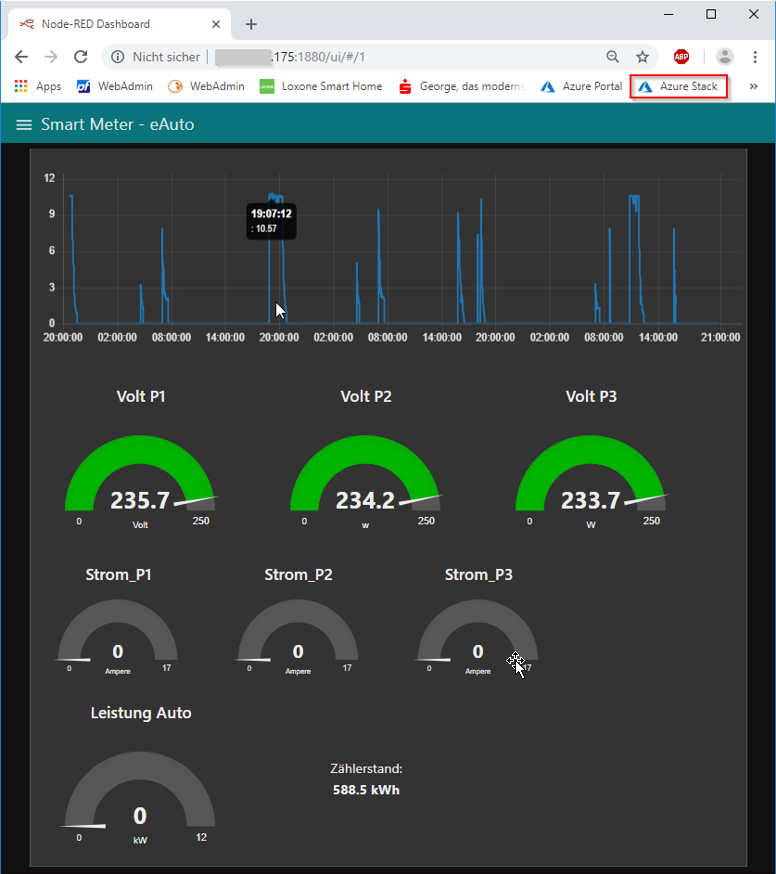
Here is my nice Node-Red Dashboard which is included but not so flexible in zooming into the data.
That’s all folks!
Hope you got some insight how i build up my solution. Of course there is no cloud system involved but if you were checking my flow carefully you saw that I send my power messages also with MQTT to an external broker at Azure Stack. But taht part I will show later…
So keep in contact…