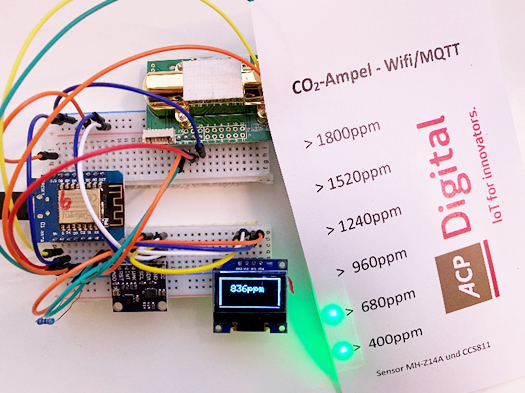
Compile your own Tasmota firmware image for an ultimative CO2 Traffic Light – TLS included!
with OLED Display, W2812, TLS enabled
As COVID-19 is now hitting us for a quite long time and will last for the next month I wanted to show my people around me how dirty is air.
I cannot find any sensor measureing the virus dust in the air but there are many sensors meassureing co2 and air quality which has a correlation to viruses flying around in our office rooms. Many colluges asking for opening the window because they have fear of getting the virus or because “the theacher” says so! In school the children are freezing because teachers are forced to open windows many times during the teaching hours but have no sense of closing the windows when it is enough. Now it is getting cold outside also the heating system has to fight against the theachers hold a good temeratur in classrooms. So my sensor can help out of many views. All together sustainability.
The main thing was to compile my own Firmware because there was no precompiled firmware with all my drivers included ;( So lets see how to compile your onw firmware of Tasmota online!
The solution looks like an easy job, buying some electronic sensors at your favorite china-platform and put things together.
Hm, no. Some sensors are really bad quality, many sensors are not doing the right job and you should know how to use them. Selecting the right library in your source code and putting things all together is also not an easy job, but i could manage it.
My Solution – things you need:
- Tasmota Firmware (of course) – download here
- ESP8266 Wemos Mini D1 – buy
- MH-Z14A CO2 Sensor (NIRD Method) – buy
- CCS811 Sensor – buy
- BMP280 Sensor (Temp/Press) – buy
- HDC1080 Sensor (Temp/Hum) – buy
- OLED Display with 64×128 pixels – buy
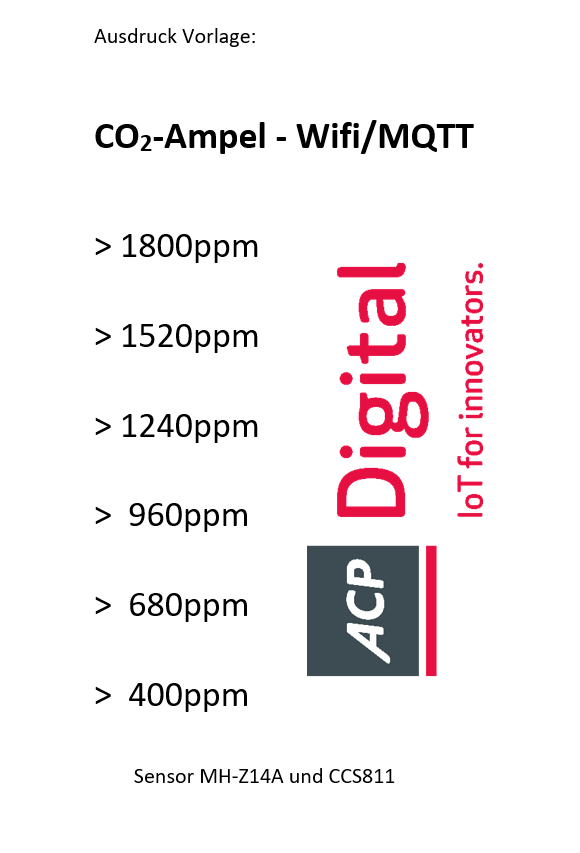
- W2812 RGB LED Stripe for Traffic light colored display – buy
- node-red – Calculation and Dashboard
- Azure IoT Central
The main topic was to find the right firmware while not programming any line of code because I wanted to setup a fully supported solution which people can use by themselves. But unfortunately, my lovely firmware Tasmota which I use for many years, had no precompiled binary-file where all my hardware items are included. There are binarys for displays or sensors not both ;( So I was forced to compile my own variation with no glue about it and no will!
Tasmota Compile!
There is an online Compiler (choose TasmoCompile) leveraging GitPod! So, I was immediately able to compile my own firmware direct from source code automatically downloaded from GitHub. Cool!
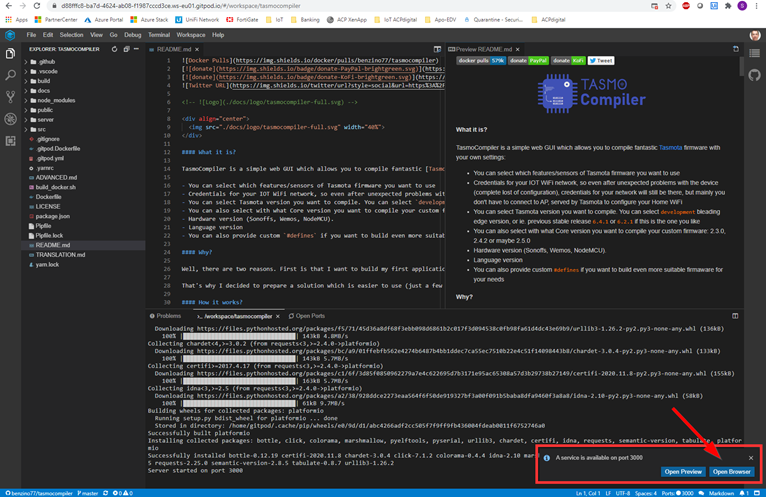
So, steps are really easy for everyone who can read. Open TasmoCompiler on the right corner of your GitPod:
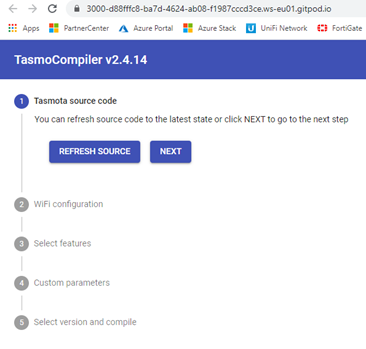
Download source code from GitHub – just click.
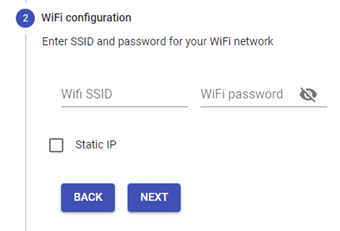
If you want you can preset your Wifi SSID and Password so Tasmota can register immediately at out Wifi – I skip that, no credentials outside my house.
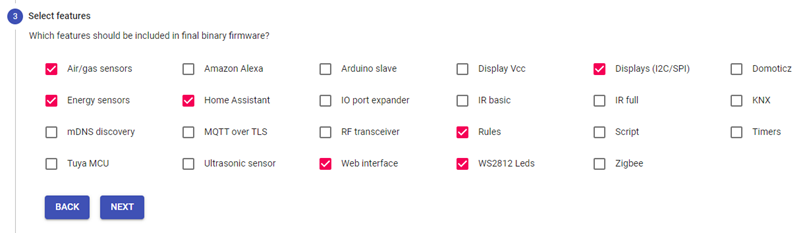
I wanted to bake a most accepted firmware for my projects, so I selected some sensors.
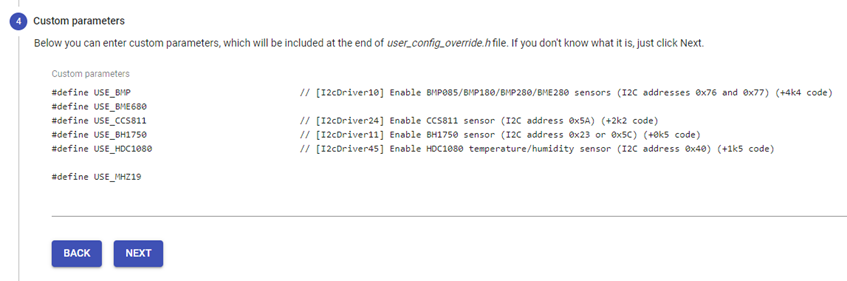
At topic 4 you can set your own parameters manually. I just wanted to make sure that my minimum sensors are included for that first run. A big help for my was an exaple of an config_override.h online.
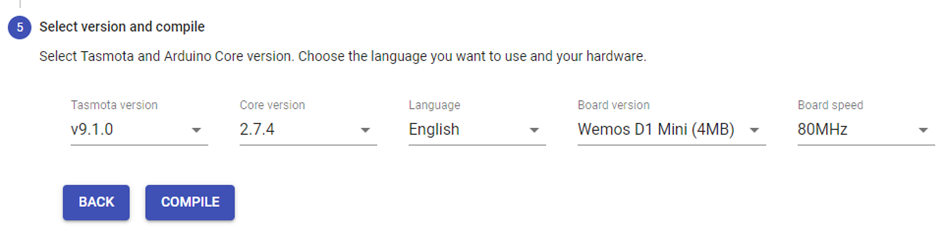
Topic 5 selecting the right firmware version and hardware platform. Then lets start compile!
After a coffee (about 2 minutes) I cloud download my fresh made firmware.bin!!!!
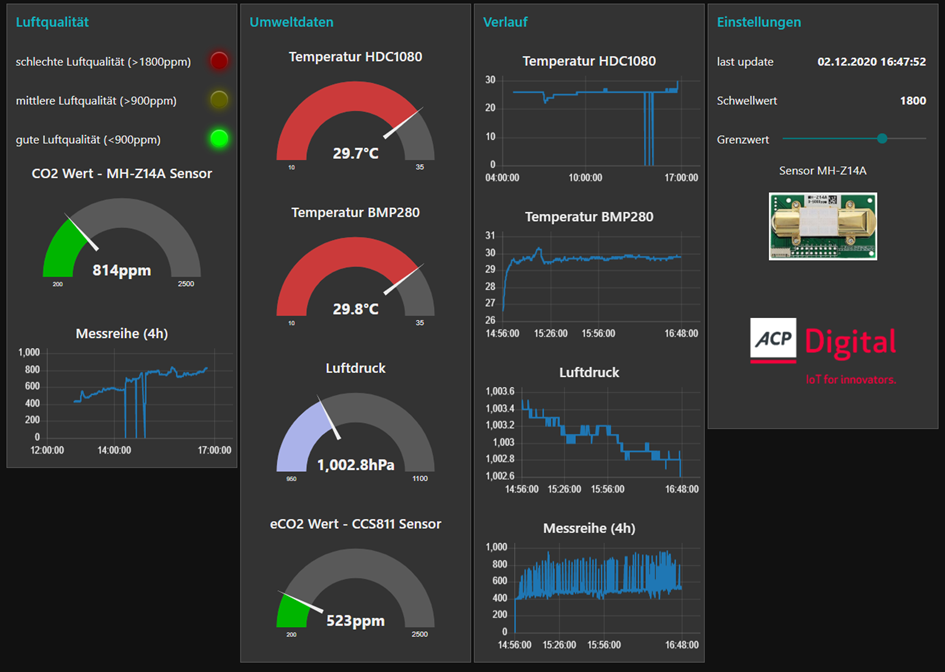
My node-red Dashboard
Here are some Screenshot of my node-red flow which i publish separatly:
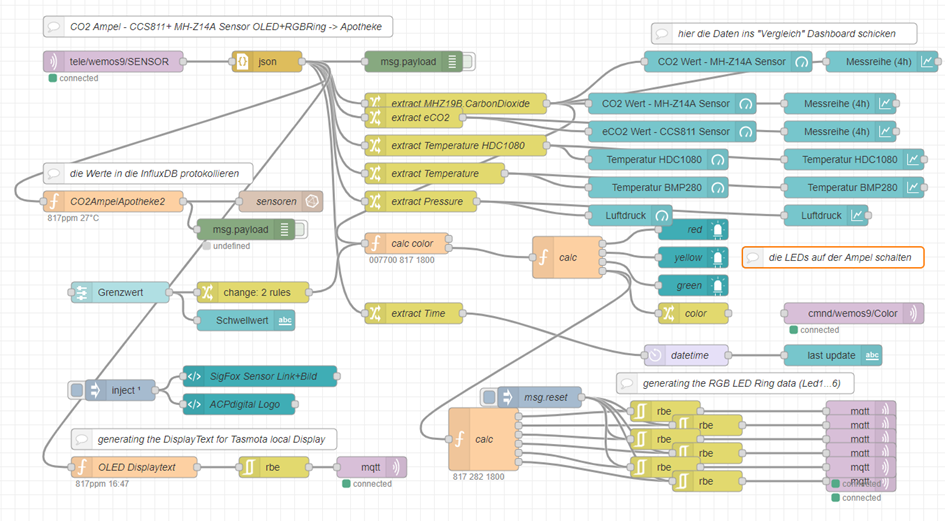
and finally my dashboard in node-red:
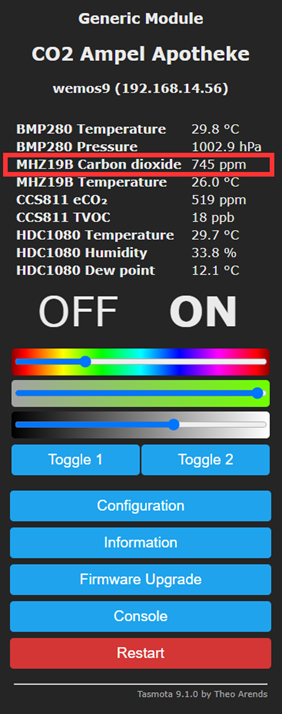
This is the built-in Website of the sensor itself coming from Tasmota – the color sliders are because there ie the W2812 RGB-Ledstripe connected which i use direct per LED with the command “LedX FF0000”:
You can read more about the node-red stuff here!